github desktop
This is part of my tutorial series on using Git and GitHub. In particular, this guide is about using GitHub’s desktop app for creating and managing repos. You can download the app here..
Honestly, the desktop app is the easiest way to do version control. Sure, it’s another app you have to have on your hard drive and something new you have to use, but it’s well designed and intuitive. I find myself using it more and more.
GitHub Desktop
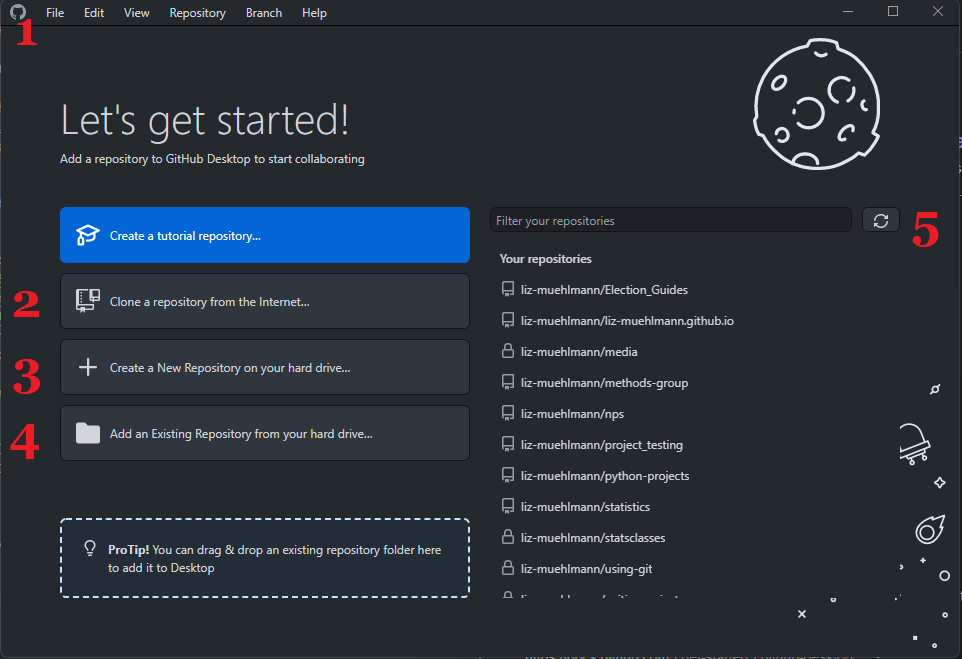
If you have no open folders, you’ll see this page when you open GitHub Desktop.
 Note: Clicking on an image will open it in the same tab.
1:
From the File menu you can either create a new repository or clone an existing repository. If you created a repo on the website and want to pull it to your hard drive, choose clone. If you need to create a brand-new repo then you’d use New repository…
2:
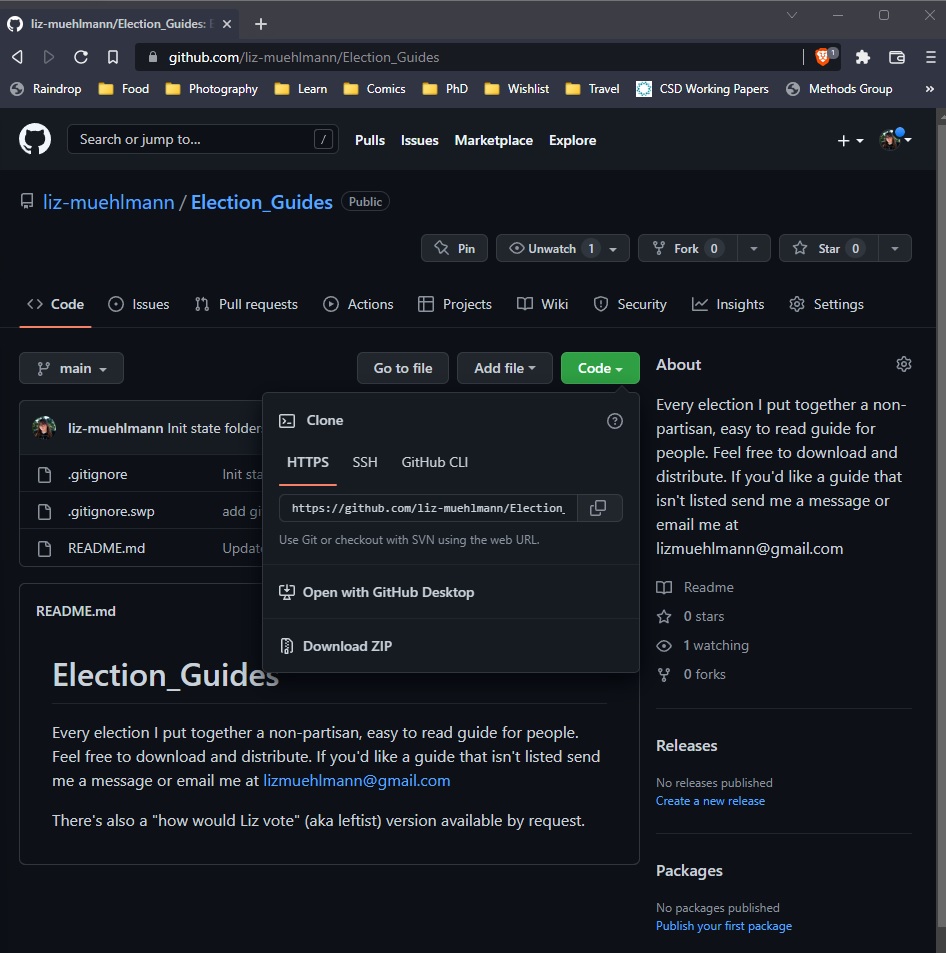
You’d use number 2 if the repo has already been created (by you or someone else) and you want to download it to your hard drive.
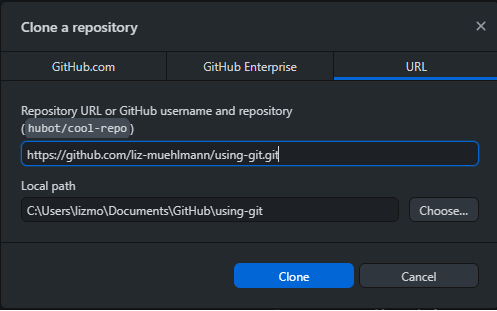
You’ll then drop that link into the URL tab of the GitHub Desktop prompt
3:
Number 3 is the same as if you select File: and select Create New Repo.
4:
You would use the Add an existing repository from your hard drive option if you had already created a repo on your hard drive (either previously cloned it or initialized it using the command line) and want to open it in GitHub Desktop.
5:
If you have repos available, you can also click on them on the right.
Once the repo is cloned to wherever you want it stored it will now be accessible on GitHub, in GitHub Desktop, and directly from your file explorer.
Workflow
One of the benefits of the desktop app is that it’s inclusive. You don’t have to remember commands, all you have to do is open GitHub desktop before and after you work on your project.
Before you start working on your project, you should pull any changes. This is less important if you’re only using one computer when working on the project and you’re the only one that’s making changes to the repo.
Before working
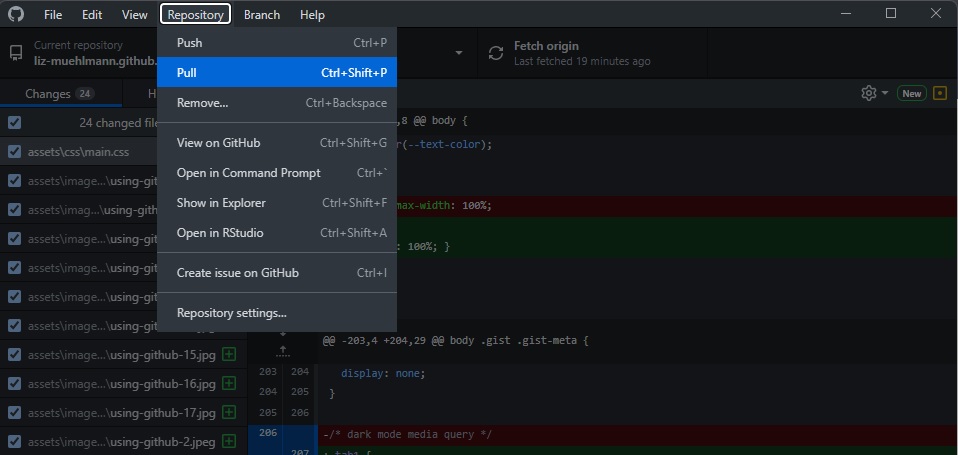
To pull changes, just click on repository and select pull.
After working
When you’re done doing work on your project, just open GitHub Desktop, enter a commit message, and hit “commit to main.”
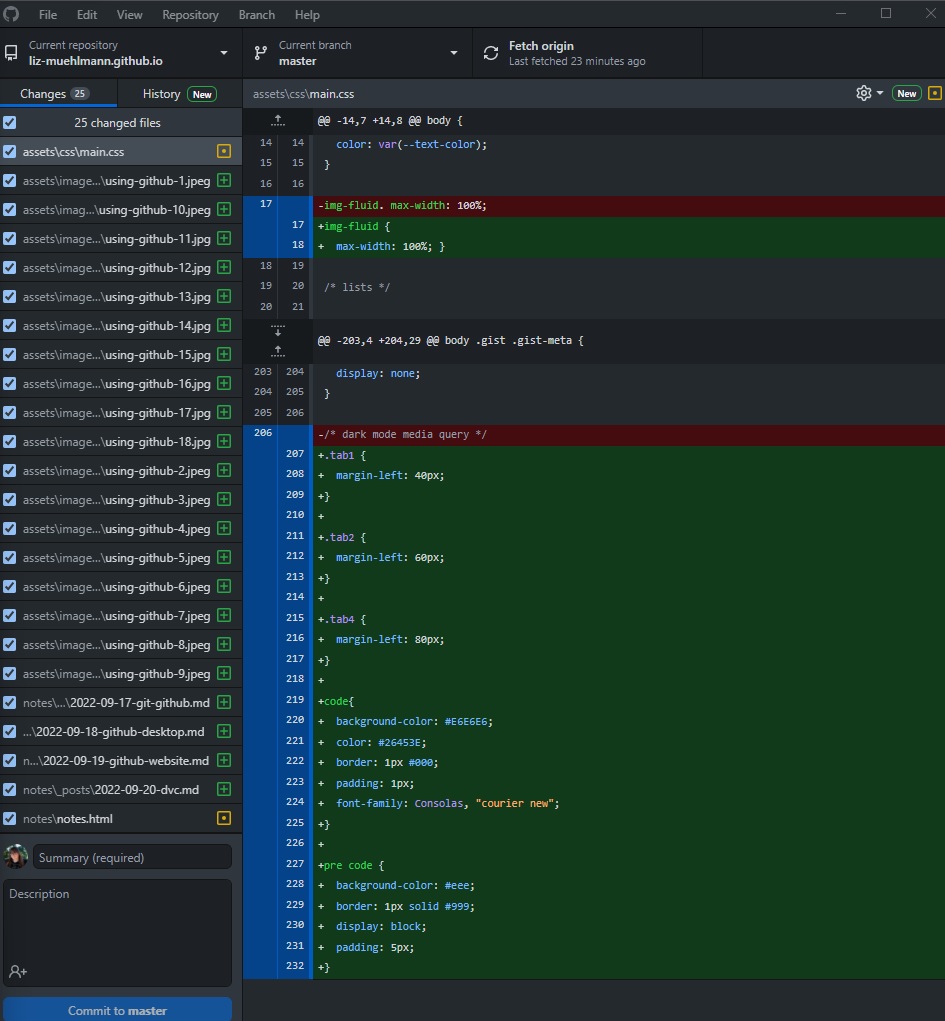
On the left hand side you’ll see a list of files you modified. All the files selected are ones you’ll be committing. If you don’t want to commit a file, just deselect it.
At the bottom of the left hand panel you’ll see two boxes:
1) Summary (required)
2) Description
The summary is mandatory. It’s a brief message about what changes were made. The description is optional and is a place where you can include more information about the changes.
Next, you’ll click the button at the bottom that says “commit to main” or “commit to master.” When you’re ready to commit your changes, you can click this button.
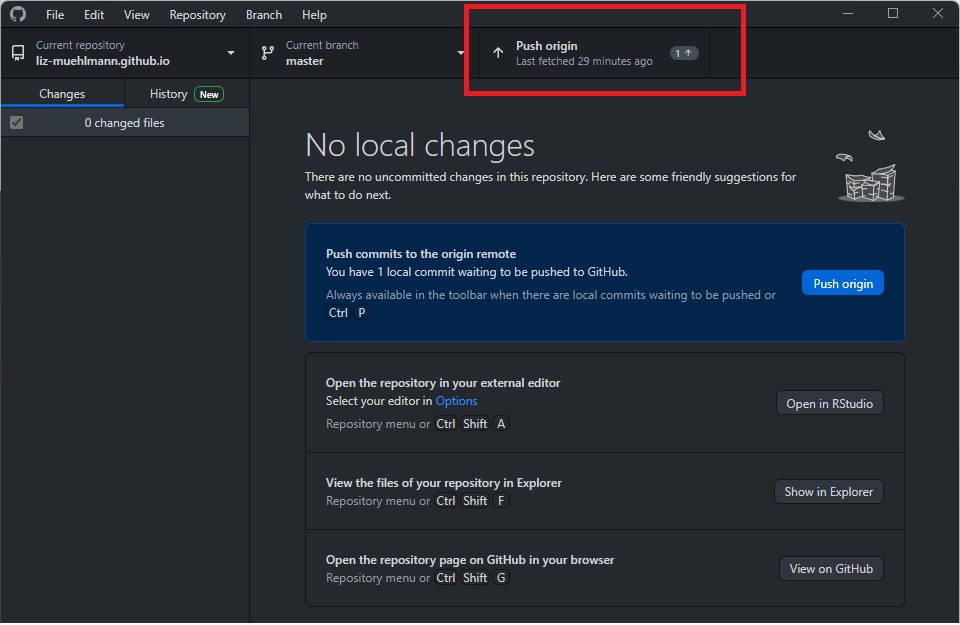
Finally, you’ll want to push the changes. On the top bar, GitHub Desktop has a box that tells you the current actions you can do. It will either say Fetch Origin (the same as pull) or Push Origin.
Conclusion:
That’s it! GitHub Desktop is very easy to use. It allows you to version control your projects and keep track of any changes that you’ve made. Whether you use the Desktop version, the website, or command line I implore you to start using version control. It saves eons of time.
Liz | 17 Sep 2022
